Looking at a big empty canvas, paper or fabric area can be pretty daunting.
I am grateful for the great stories and questions about artmaking blog-readers share with me. Fear of messing up is at the heart of many questions, and a desire to get over it is at the heart of many stories. (There’s a nice success story from a reader at the end of this blog.)
So, this morning I was also encountering fear of a big piece to fill, looking at a wide empty piece of muslin. I have a vision for a new quilt, and I know how I want this section to function. Now’s the time to begin.
First things first. I experience the beginning of artmaking rhythm during set-up. (I love the simple act of putting on my painting apron!) I pulled the paint colors I wanted to use onto my worktable and arranged them around my palette. I spooned out a few blops of color and began to mix. (Color note. I almost never use a paint color straight from the jar. Mixing colors is the key to a palette where the parts speak to each other.)
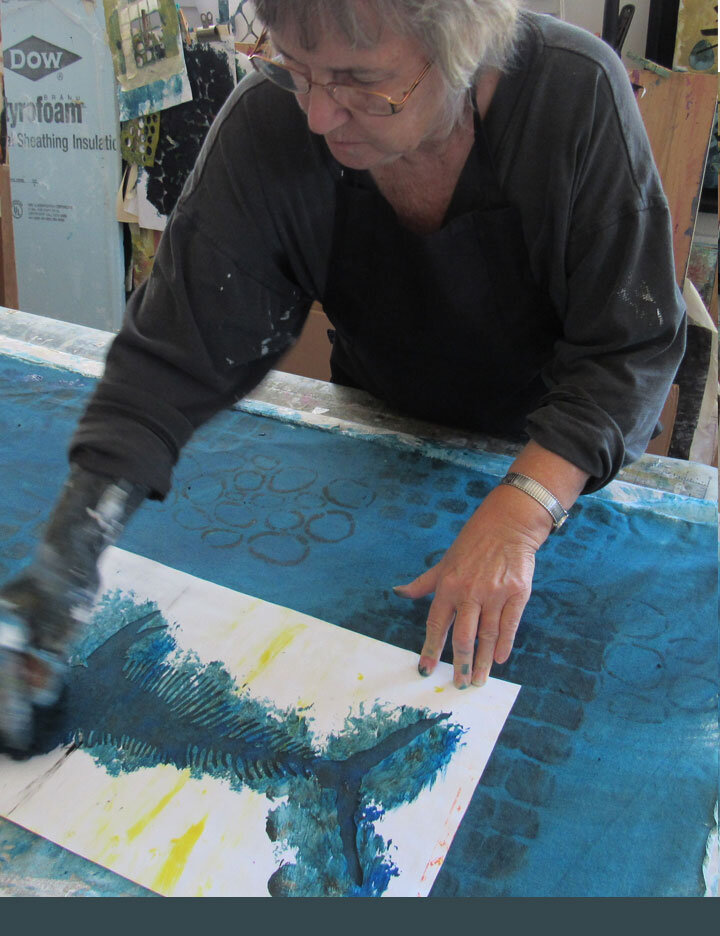
Sponge painting acrylics onto fabric goes fast. Once I begin, a few minutes later I have a few yards with the basic color down. I wet my sponge just a bit and picked up some color from the palette. Big strokes, big arm movements. The color is not solid, but shows some of the component parts as blends.
I want some subtle image elements in this section so I’ve selected some of my favorite stencils. I’ve sponged in some geometric shapes. Now for the prehistoric fish.
This hand-cut fish skeleton is one of the first stencils I cut and preserved for re-use. It’s based on an illustration I discovered of a Portheus, an extinct species from over 90 million years ago. I have images of this fish in several sizes, both positive and negative images. It’s strongly connotative to me: the passage of time, the fear of the unknown beneath the surface.
For a first layer, I’m pleased with the results. The section is still a bit flat, and will need some more subtle layers of transparent color to get the depth I want. This may stay as a whole-cloth section, or I may cut it into sections to stitch together. All decisions for the next work session
For now, the blankness has been filled. A good first step.
Here’s the successful experiment sent to me from a blog-reader. Janet Pugh from Arizona has been intrigued with wheat-paste resist and the wonderful crackle effects it creates She used the resist to make the texture in the background of this quilt section behind the crocus. Her email to me described a lot of experimentation, with a mix of successes and failures. Yup. That’s how it works! I think it looks great and I‘m so glad Janet shared it.
And I also like her creative composition: squares, but not.
Fear – bad.
Experimenting and creating – good!
Happy creating.
Thank you for reading. I always enjoy questions and comments.
--Bobbi
bobbibaughart@gmail.com
BLOG POSTS: If you would enjoy receiving blog posts by e-mail, please subscribe here: I post blogs once a week. BLOGS-BY-EMAIL
NEWSLETTER: If you enjoy more detailed behind-the-scenes stories, as well as FIRST LOOKS at new works and members-only discounts, I hope you’ll become a Studio Insider. You’ll hear from me about once a month. NEWSLETTER


